Accessible Showers: Beginner’s Guide to Designing Accessible Showers
What is an Accessible Shower?
An “accessible” shower is one that’s user-friendly and optimized with design elements that readily work for everyone. It should…
- be easy to enter and exit for all users alike, from those who can walk easily to those who rely on a wheeled mobility device.
- be designed so bathers can access all items including the shower controls, water, soap and shampoo from both a seated and standing position.
- include either a permanently installed shower seat (ideally flip-up style seat, so it can be moved out of the way if needed) or adequate space for a portable shower seat
- have slip-resistant flooring
- have shower controls that are easy to operate (i.e. single lever style)
- provide helpful handholds or grab bars to hold onto for balance and support.
Accessible Shower Features
Following is a break down of the features most commonly found in an accessible shower, and an overview of important things to keep in mind when selecting, designing, or installing each.
1. Shower Entrance
The shower’s entrance should be wide enough to allow a walker, wheelchair, or wheeled shower chair to pass through with ease. In general, most (but not all) persons using mobility aids will be able to pass through an opening that is 32″ wide. If the shower is being designed for a specific individual’s needs, make sure to take into account both the width of the person’s mobility device and their skills for maneuvering with the equipment when selecting an appropriate shower door width.
2. Shower Curtain or Shower Door: Which is Best?
This is a common question that arises when designing an accessible shower. Shower curtains are usually preferable to glass shower doors from an ease-of-access standpoint. A shower door creates one more obstacle for a person using a walker or wheelchair to contend with. Not only are shower curtains usually easier for most persons using mobility devices to manage, but they are also safer because glass shower doors can and do have a history of spontaneously shattering.
In the event that you do opt to use a shower door, make sure to install it so it swings outwards or slides sideways. Why is this important? Because if a person experiences a fall while inside of a shower with an inward-swinging door their body can block the door from opening, making it difficult for rescue personnel to get them out.
3. Zero Threshold
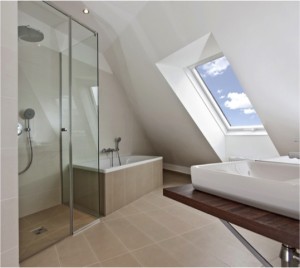
A flush, zero-threshold entrance is ideal. Even a small threshold of just one to two inches high can prevent entrance by a walker or wheelchair, consequently increasing the likelihood a person will have to ask someone else for help to get in and out of the shower.
What if the home has concrete slab floors or other architectural design features that would make it more difficult (or impossible) to install a zero-threshold shower? If installing a threshold at the shower entrance cannot be avoided, try to install the smallest threshold possible, ideally the threshold should be 1/2 inch or less with a rounded (aka beveled) edge, which will allow for most wheeled mobility devices to pass over.
4. Shower Seat
Shower seats come in a variety of shapes and styles, which include: stools, chairs and benches. The “bench-style” shower seats tend to be better than the stools and chairs because they have a larger sitting surface, making it is easier to safely land on when sitting down. The wider seat can also provide a helpful place for you to rest a wash cloth or other shower items on the bench seat beside you within easy reach while you are bathing. Bath benches can come in portable, free-standing models or models designed to be securely attached to the shower wall. A wall-mounted shower seat is, in general, a more stable option than the portable-style bath seats (if it’s installed correctly).
If you are remodeling your bathroom from scratch and you do choose to install a wall-mounted shower seat, in most cases it is a good rule of thumb to leave one of the sides of the shower seat exposed and free of walls. Why? Doing so makes it possible for a wheelchair user to park their wheelchair next to the shower stall, remove one of the armrests from their wheelchair, and then slide themselves independently and/or with help the help of a caregiver sideways from the seat of their wheelchair over onto the shower seat. When you are planning your bathroom layout, make sure there is clear floor space present inside the bathroom directly adjacent to the shower’s seat so that a wheelchair user has space to park their wheelchair directly beside the shower seat.
5. Handheld Shower Head
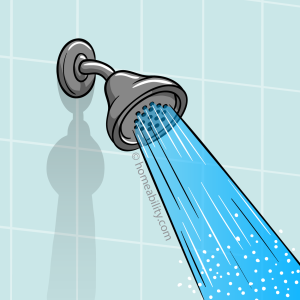
Standard overhead showerheads that are fixed to the front wall of a shower will typically reside too far away from where a seated bather performs their shower. Installing a handheld showerhead, also known as an adjustable showerhead, can greatly enhances a seated user’s ability to access the water and bathe independently.
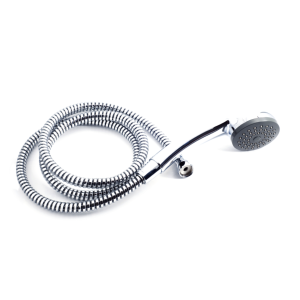
Some handheld showerhead models simply consist of a showerhead that is attached to the end of an adjustable hose. Others come attached to a vertical slide bar that gets fixed to the shower wall. The vertical bar is helpful for holding the showerhead while a bather is soaping and shampooing. Some models with a vertical slide bar have been cleverly designed to dual as a grab bar as well, giving bathers a safe place to hold onto while bending to wash legs and feet and/or for assist when stepping in and out of the shower. To learn more, visit Homeability’s Handheld Showerhead Guide.
6. Shower Controls
It is unfortunately all too common to encounter a so-called “accessible” shower with a permanently installed seat inside of it that’s located nowhere near to the showerhead or shower controls! If you are designing a new shower, try to design it so that both the shower controls and a showerhead (either an overhead showerhead or an adjustable showerhead) can be readily accessed by a seated bather.
The shower controls should ideally be installed in a location that is reachable both by a person standing outside the shower, as well as by a person seated inside the shower. A location that allows for easy access in both of these scenarios will make it possible for you to turn the water on and warm it up prior to getting in, as well as possible for the user to adjust the temperature when seated inside.
As for the controls themselves, a single lever-style shower control is easiest for most persons to operate, especially those with poor hand strength or arthritic fingers. The lever-style even allows a user the option to nudge the water on and off using a wrist or elbow if need be.
7. Storage
Make sure to include ample storage for shampoo, soap and razors within reaching distance of the seat. Storage shelves should ideally be recessed into alcoves in the wall to prevent them from interfering with grab bars and/or valuable clear floor space inside the shower. Don’t forget to provide a towel rack or hook within easy reaching distance of the shower seat!
8. Anti-Scald Device
Install an anti-scald device for regulating the water temperature. This helps to prevent burns and falls. Falls can occur when individuals try to rapidly retreat from a shower that is too hot or when water temperatures change unexpectedly (i.e. when someone else flushes a toilet elsewhere in the home).
9. Shower Flooring
Make sure to select non-glossy, slip-resistant flooring materials for the shower stall and the bathroom floor. Flooring with a slip-resistant, wet rated coefficient of friction (COF) of 0.6 or higher is generally considered to be safe. Examples of non-slip flooring include: porcelain tiles with a matte or textured finish, vinyl flooring with a nonskid polish, quarry tile with many narrow joints.
If a tile floor is chosen, a floor composed of smaller sized tiles (e.g. 2”x2”) will inherently have more grout lines present than a floor made up of larger tiles. The grout lines can be beneficial because they provide additional friction to help prevent feet from slipping across a wet floor. If you do choose to install a tile floor, make sure the grout lines that are present between the tiles aren’t greater than ¾” wide or they can catch walker and wheelchair’s wheels making it more difficult for a wheelchair or walker user to move and turn.
Glossy floors should be avoided. They can be slippery and can also create a glare when lights reflect off of them, making it disorienting for an individual with unsteady gait or reduced visual skills.
10. Lighting
Most standard showers don’t include a light over the stall. With age, as well as with some illnesses, eyes tend to change, making it harder to see well when light quality is poor. Installing a waterproof light over the shower stall can be a helpful, welcome addition.
11. Vent
For persons who have respiratory problems or problems regulating body temperature, make sure to select a high functioning vent so it is easy to regulate the room temperature and humidity levels.
12. Heat Lamp
A person with mobility issues will often move more slowly, requiring more time to get in and out of the shower. Furthermore, as age increases skin tends to thin, making it more difficulty to maintain body heat. Having a heat lamp can be a nice addition to help the user stay warm while getting in and out of the shower and drying off.
13. Mirror
For men who like to shave while in the shower, make sure to include a fog-free, adjustable height mirror.
Common Design Errors to Avoid!
As simple as the information above may appear to be, it is all too common for things to be forgotten or implemented incorrectly when installing an accessible shower. The most common design errors include:
- Installing a wall on both sides of the shower seat. This can make it difficult or impossible for a person with mobility impairments to access the shower seat.
- Unnecessarily installing a few-inch threshold at the shower stall entrance (when the architecture permits installation of a flush, curb-less style shower). A simple one to two inch threshold can make it more difficult and/or impossible for a person using a walker or wheelchair to enter the shower.
- Installing the shower head too far away from the shower seat, which makes it difficult or impossible for a seated user to sit underneath the running water while bathing.
- Installing the shower controls too far away from the shower seat, which can make it difficult or impossible for a seated user to independently access the on/off controls and adjust the temperature.
- Not installing a place to store the soap and shampoo within reaching distance of the seat!
- Not providing sufficient clear floor space (free of toilet, vanity and other obstructions) beside the shower seat so a user can easily approach the shower seat using their walker or wheelchair.
- Not taking time to understand how a person moves and/or performs transfers from one surface to the next PRIOR to designing the shower stall’s layout, selecting the shower stall’s size, and/or selecting the shower equipment. It is important to take into account how an individual moves to ensure that the end result will best meet a person’s needs. It is also important to take into account that a person’s needs can change over time and with age, so it is always desirable to choose the most future-proof option available.
Accessible Shower Products Amazon.com
 The Homeability Advice™
Curbless showers just make great design sense! They are versatile, accessible by all users, and beautiful in their simplicity. If your finances and the architecture of your home permits, having at least one curb-less style shower in your home (ideally located on the ground floor) is the best way to ensure you can enjoy a lifetime of hot showers. It’s just as easy for someone who can walk easily to enter a curbless shower, as it is for someone who uses a cane, walker, wheelchair or self-propelled wheeled shower chair.
Are you helping to create the design plans or make a space accessible for another individual? If so, the first step should be to have the person perform a few transfers to different surfaces. Ask them to sit down on a toilet, bed, chair etc. and observe how they move, where they want to reach out to grab for support etc. Ask the person, if they are able to do so, to try out an accessible shower at a public pool, YMCA, hotel, or in the hospital (if they are still an in-patient), and have them take pictures or a video of it so you can observe how they move. Ask them what worked or didn’t work for their needs with respects to the height of the seat, placement of the grab bars, and so on. Then armed with this knowledge you can create designs that will best fit their needs and preferences.
Rolling Shower Chairs Amazon.com
You May Also Be Interested In
- Grab Bars: Which Type is Best?
- Curbless Shower: 8 Ways to Contain the Water Inside
- Tips for Selecting a Prefabricated Accessible Shower
- “Clear Floor Space Guidelines” for Accessible Bathrooms
- The Truth About Home Modification Funding

